
The Science of Splashbacks: Protecting Your Walls and Adding Style
When it comes to the heart of your home, the kitchen, there's much more than meets the eye. Beyond the aroma of sizzling spices and the symphony of sizzling pans, your kitchen is a canvas for creativity, an arena where culinary magic happens daily. Yet, it's not just about what's cooking on the stove; it's also about the kitchen's aesthetic and functionality. One often-overlooked but crucial element in this regard is the humble splashback.
Splashbacks are not merely a protective barrier for your kitchen walls; they are a style statement, an essential component that ties the room together. They serve as a shield against the inevitable splashes, stains, and spills that accompany meal preparation, but they can also elevate your kitchen's design and ambiance. In this article, we delve into the science of splashbacks, exploring the intriguing balance between form and function.
The Role of Splashbacks in Kitchen Design:
Splashbacks play a crucial role in both the aesthetics and style of a kitchen. They are not just practical elements but also serve as a design feature that can significantly impact the overall look and feel of your kitchen. Here's a closer look at the significance of splashbacks in kitchen aesthetics and how they can set the tone for your kitchen's style:
Protection and Functionality:
Splashbacks primarily serve as a protective barrier between your kitchen walls and cooking activities. They help prevent food splatters, grease, and moisture from staining or damaging the walls. This functional aspect ensures that your kitchen remains easy to clean and maintain, saving you time and effort in the long run.
Aesthetic Enhancement:
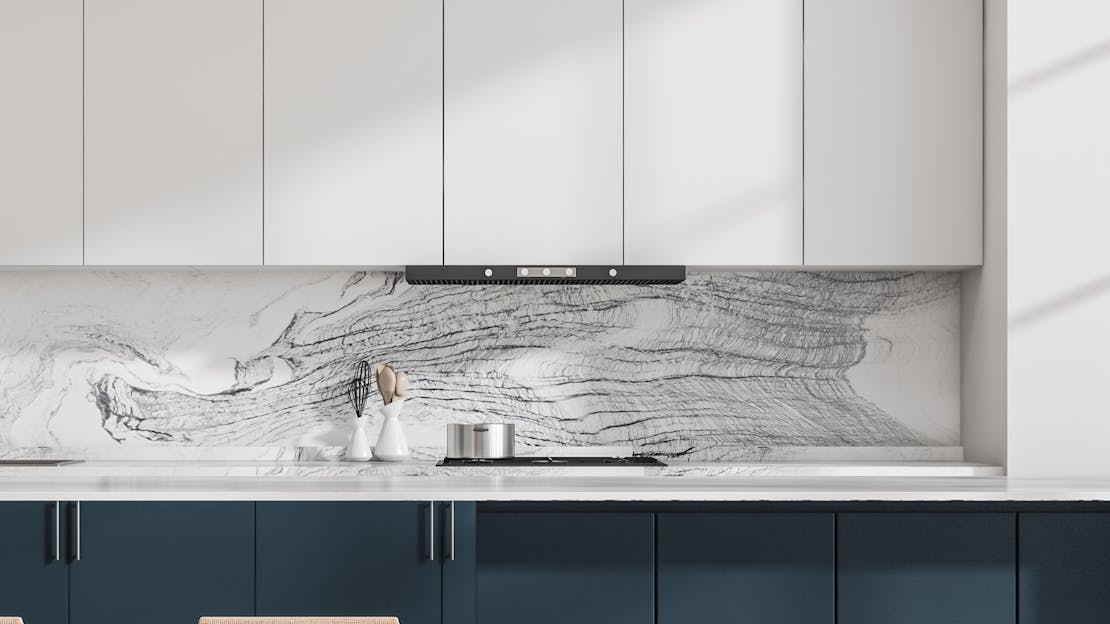
Splashbacks are an opportunity to introduce colour, texture, and personality into your kitchen's design. By carefully selecting the material, colour, and pattern of your splashback, you can elevate the visual appeal of your kitchen. Whether you prefer a sleek, modern look or a more traditional, rustic feel, splashbacks can be customised to complement your design vision.
Focal Point of the Kitchen:
In many kitchens, the splashback area is a focal point due to its central location and the potential for eye-catching design elements. You can use splashbacks to draw attention and create a sense of drama or interest. For instance, a bold, colourful glass splashback can become the centrepiece of a minimalist kitchen, while a mosaic or patterned tile splashback can add a touch of elegance.
Creating Visual Continuity:
Splashbacks can contribute to the overall flow and harmony of your kitchen's design. They can help tie together different elements such as cabinets, countertops, and flooring. By choosing a splashback that complements or contrasts with these elements, you can create a cohesive and balanced look.
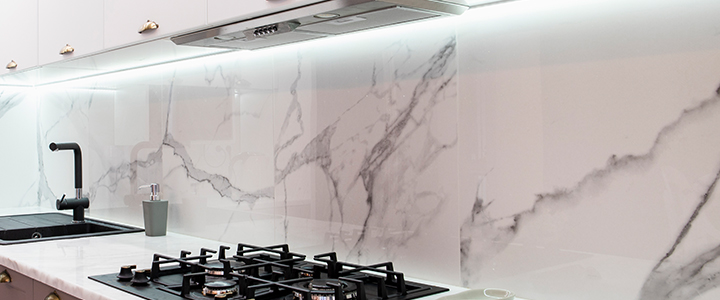
Reflecting Light and Space:
Reflective materials like glass or mirrored splashbacks can make a small kitchen appear larger by bouncing light around the room. This can enhance the sense of space and openness in your kitchen.
Setting the Tone for Style:
The choice of materials and colours for your splashback can set the tone for your kitchen's style. Here are a few examples:
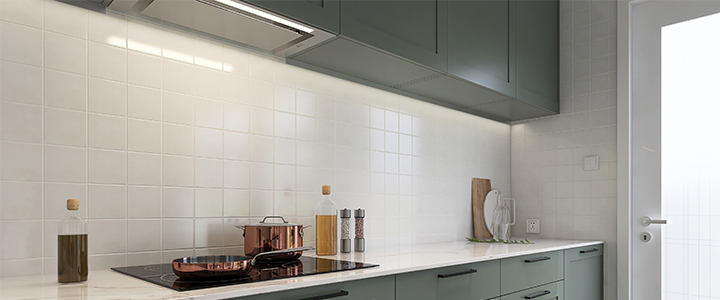
Modern and Minimalist: Choose sleek, monochromatic materials like glass or stainless steel for a contemporary and minimalist look.
Rustic and Traditional: Opt for natural materials like stone, brick, or ceramic tiles in warm, earthy tones to create a rustic and traditional atmosphere.
Eclectic and Vibrant: Experiment with bold colours, patterns, and mixed materials to infuse your kitchen with an eclectic and vibrant style.
In conclusion, splashbacks serve a dual purpose in the kitchen: they offer practical protection for your walls and serve as a canvas for expressing your personal style and design preferences. Understanding their significance in kitchen aesthetics and how they can set the tone for your kitchen's style allows you to make informed choices that transform your kitchen into a visually appealing and functional space.
What types of materials are available for splashbacks?
Here's a table providing an overview of common splashback materials, along with their pros and cons in terms of both practicality and style:
Splashback Material | Practicality Pros | Practicality Cons | Style Pros | Style Cons |
Glass | Easy to clean, non-porous surface | Can be prone to smudges and fingerprints | Sleek and modern appearance, reflects light | Limited colour options, can show water spots |
Tile | Durable and heat-resistant, wide variety of styles | Grout lines can be challenging to clean | Versatile design options, customisable | Grout can discolour over time, can look busy |
Stainless Steel | Highly durable, resistant to heat and stains | Can show scratches and dents | Contemporary and industrial look | Cold and sterile appearance for some |
Acrylic | Lightweight and easy to install, customisable | Not as heat-resistant as other materials | Glossy and seamless appearance | Prone to scratching and can yellow over time |
Natural Stone | Elegant and unique, durable when sealed | Requires regular maintenance and sealing | Adds natural beauty and texture | Limited colour choices, expensive |
Laminate | Budget-friendly, easy to clean | Not as durable as other materials | Wide range of colours and patterns | Can look cheap, not heat-resistant |
Metal (Copper, Brass, etc.) | Unique and eye-catching, durable | Can tarnish and require maintenance | Adds warmth and character | Expensive, may not suit all kitchen styles |
Ceramic | Durable and heat-resistant | Limited design options compared to tile | Classic and timeless appearance | Limited design options compared to tile |
Mirror | Reflects light, visually enlarges space | Prone to smudges and fingerprints | Adds a sense of depth and glamour | Requires frequent cleaning, may not suit all styles |
Please note that the choice of splashback material should consider your personal preferences, budget, and the overall design of your kitchen, in addition to practicality and style. Each material has its own unique characteristics and can contribute to the aesthetic and functionality of your space in different ways.
The Science of Protection
Splashbacks serve several functional aspects in shielding walls from damage in a kitchen and contribute significantly to maintaining kitchen hygiene and ease of cleaning:
Functional Aspects in Shielding Walls from Damage:
Moisture Protection: Splashbacks create a barrier that shields the wall from moisture, which is prevalent in kitchens. They prevent water, grease, and other liquids from seeping into the wall, thereby reducing the risk of water damage, mould growth, and structural issues.
Stain Prevention: Splashbacks are designed to resist stains and splatters from cooking and food preparation. They can be easily wiped clean, preventing stubborn stains on the wall surface.
Heat Resistance: In cooking areas, splashbacks protect walls from the high temperatures produced by hobs and ovens. Heat-resistant materials, such as stainless steel and toughened glass, can prevent heat-related damage to the wall, such as discolouration or warping.
Durability: Many splashback materials are chosen for their durability, ensuring that the wall remains intact and free from damage over time. Durable materials like ceramic tiles, stainless steel, and natural stone can withstand wear and tear.
Easy Maintenance: Splashbacks are designed to be easy to clean and maintain. Their smooth and non-porous surfaces make it simple to wipe away spills, grease, and food residues, contributing to a hygienic kitchen environment.

Maintaining Kitchen Hygiene and Ease of Cleaning:
Smooth and Non-Porous Surfaces: Splashbacks typically have smooth and non-porous surfaces that resist the absorption of liquids and prevent the growth of bacteria, mould, and mildew. This helps maintain kitchen hygiene by reducing potential sources of contamination.
Easy Wipe-Clean Surfaces: The smooth and easily wipeable nature of splashback materials, such as glass or stainless steel, simplifies cleaning. Spills and splatters can be quickly and efficiently wiped away with minimal effort.
Reduced Grout Lines: While tiles are a common splashback choice, they may have grout lines that can collect dirt and grime over time. Choosing larger tiles or materials with minimal grout lines can make cleaning easier and more hygienic.
Stain Resistance: Splashbacks are often made from materials that are resistant to staining, which is essential in a kitchen environment. This ensures that even stubborn stains from sauces or cooking oils can be easily removed.
Hygienic Material Choices: Some materials, such as stainless steel and glass, are naturally hygienic due to their non-porous surfaces. They are also resistant to odours and do not trap food particles, making them easier to keep clean and maintain kitchen freshness.
Quick and Regular Cleaning: Splashbacks encourage regular cleaning habits as they are prominently placed in the kitchen. This can lead to a cleaner and more hygienic cooking environment.
In summary, splashbacks play a dual role by shielding kitchen walls from damage caused by moisture, heat, and stains, while also contributing to kitchen hygiene and ease of cleaning through their smooth, non-porous, and easy-to-maintain surfaces. They are an important feature in maintaining a functional and clean kitchen space.
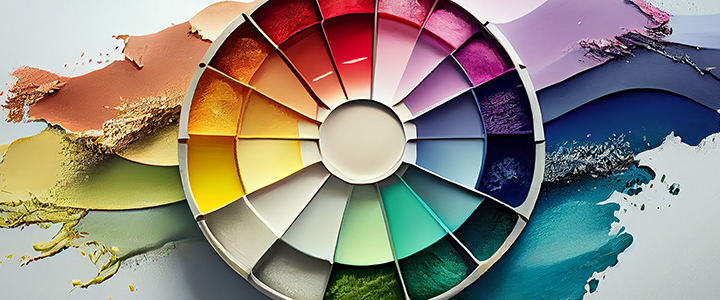
Colour and Texture Selection:
The Impact of Colour Selection:
Warm vs. Cool Tones: Warm colours like reds, yellows, and oranges create a cosy and inviting atmosphere. Cool colours like blues and greens can evoke a sense of calm and freshness. The choice between warm and cool tones can set the overall mood of your kitchen.
Light vs. Dark Shades: Light colours can make a kitchen feel more open and spacious, while dark shades can add drama and sophistication. Darker colours can also create a cosy and intimate atmosphere.
Monochromatic vs. Contrast: A monochromatic colour scheme, using different shades of the same colour, can create a harmonious and calming effect. Contrasting colours, on the other hand, can add visual interest and create focal points in the kitchen.
The Impact of Texture Selection:
Smooth vs. Textured Surfaces: Smooth surfaces like glossy tiles or polished countertops can reflect light and create a sleek, modern look. Textured surfaces like natural stone or distressed wood can add depth and character, creating a more rustic or traditional ambiance.
Pattern and Depth: The use of patterns, such as geometric tiles or patterned wallpaper, can add visual interest and personality to the kitchen. Textures with depth, like subway tiles or beadboard, can create a sense of dimension and charm.
Natural vs. Industrial: Natural textures like wood and stone can bring a sense of warmth and organic beauty to the kitchen. Industrial textures like stainless steel or concrete can create a modern, urban, and edgy vibe.
Advice for Choosing the Right Colours and Textures:
Consider Your Kitchen Style: Start by identifying the style you want to achieve in your kitchen. Whether it's traditional, modern, rustic, or eclectic, your colour and texture choices should align with that style.
Balance Light and Dark: Striking a balance between light and dark colours can create contrast and visual interest. For example, you can have light-coloured cabinets with a dark countertop or vice versa.
Think About Functionality: Keep in mind the practicality of your choices. Light colours may require more maintenance to keep clean, while textured surfaces can hide smudges and imperfections.
Sample Swatches: Obtain swatches or samples of your chosen colours and textures to see how they look in your kitchen's lighting conditions. Natural and artificial lighting can significantly affect how colours appear.
Consider Trends vs. Timelessness: While it's tempting to follow design trends, consider whether your choices will stand the test of time. Neutral colours and classic textures are often safer bets for long-term satisfaction.
Use Accents: If you're unsure about committing to a bold colour or texture, consider using them as accents through accessories, décor, or smaller elements like splashbacks.
Seek Professional Advice: If you're unsure about your choices, consult with a professional interior designer or decorator who can provide guidance based on your kitchen's specific layout and style goals.
In summary, the selection of colours and textures in your kitchen can greatly influence the overall ambiance and style. Consider your kitchen's style, lighting, and practicality when making choices, and don't be afraid to experiment with different combinations until you find the perfect balance for your desired kitchen atmosphere.
Installation of Splashbacks
Here's the step-by-step guide to installing splashbacks, whether you're a DIY enthusiast or hiring professionals:
Preparation:
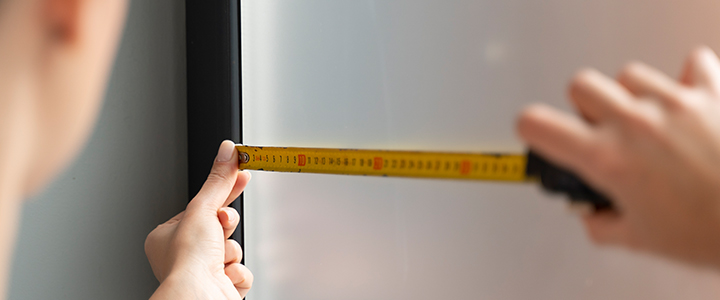
1. Measure the Area: Accurately measure the area where you intend to install the splashback. This will help you determine the size and quantity of materials required.
2. Choose Splashback Material: Select the type of splashback material that suits your style and needs. Common options include glass, tiles, stainless steel, and acrylic.
3. Gather Tools and Materials: Assemble all the necessary tools and materials, such as adhesive, grout, screws, a spirit level, a tile cutter (if using tiles), and safety equipment like goggles and gloves.
Installation Steps:
Note: The installation steps may vary depending on the type of splashback material chosen.
1. Surface Preparation:
Ensure the wall surface is clean, dry, and free from grease, dirt, and debris. If required, repair any damaged or uneven areas.
2. Marking and Layout:
Use a spirit level to create guidelines or layout marks on the wall. This ensures the splashback is installed straight and level.
3. Cutting and Sizing:
If using tiles or other materials that need cutting, measure and cut them to fit the installation area. Leave space for any outlets or fixtures.
4. Apply Adhesive:
Apply adhesive to the wall using a notched trowel. The size of the trowel and the type of adhesive will depend on the chosen material. Follow the manufacturer's instructions.
5. Install Splashback Material:
Gently press the splashback material into the adhesive, starting from one corner or edge. Ensure it aligns with the layout marks.
6. Secure and Support:
Use screws or suitable fasteners to secure the splashback in place, especially if it's a heavy material like glass or metal. Use wall plugs if needed.
7. Tile Grouting (if applicable):
If you're installing tile splashbacks, apply grout between the tiles. Use a grout float to spread it evenly and wipe off excess grout with a damp sponge. Allow the grout to dry according to the manufacturer's instructions.
8. Clean and Finish:
Remove any excess adhesive or grout with a scraper or damp cloth before it dries completely. Clean the splashback surface to remove any smudges or residue.
9. Seal (if necessary):
Depending on the material, you may need to seal the splashback to protect it from stains, moisture, or other potential damage. Follow the manufacturer's recommendations for sealing.
10. Final Inspection:
Carefully inspect the installed splashback for any visible imperfections, unevenness, or gaps. Make any necessary adjustments or corrections.
11. Finishing Touches:
Replace any fixtures, switch plates, or outlet covers that were removed during installation.
12. Enjoy Your New Splashback:
With the installation complete, you can now appreciate the functional and aesthetic benefits of your splashback in your kitchen.
Safety Tips:
- Always wear appropriate safety gear, including goggles and gloves, when working with tools, adhesives, or materials.
- Adhere to safety guidelines and instructions provided by the manufacturer of the splashback material and any adhesives or grouts you use.
- If you're unsure about any aspect of the installation, consider consulting a professional installer to ensure a safe and proper installation.
Whether you're a DIY enthusiast or hiring professionals, a well-installed splashback can enhance the functionality and appearance of your kitchen while also protecting the underlying wall surface.
Maintenance of Splashbacks
Here are some best practices for cleaning and maintaining your splashbacks to ensure their long-lasting beauty and functionality:
Cleaning Splashbacks:
Regular Cleaning: Establish a routine for regular cleaning to prevent the accumulation of dirt and stains. How often you clean will depend on the material and usage level, but typically, a weekly wipe-down should suffice.
Use Mild Cleaners: For most splashback materials, use mild dish soap or a gentle, pH-neutral cleaner mixed with warm water. Avoid abrasive or harsh chemicals that can harm the surface.
Avoid Scratches: When cleaning, use soft, non-abrasive cloths or sponges to prevent scratching the surface. Microfibre cloths or soft cotton towels are suitable options.
Promptly Remove Stains: Address spills and stains promptly to prevent them from becoming permanent. Blot or gently wipe the affected area with a damp cloth or sponge.
Glass Cleaner for Glass Splashbacks: If you have a glass splashback, use a glass cleaner to remove streaks and smudges. Ensure the cleaner is safe for use on glass surfaces.
Grout Maintenance (for Tiled Splashbacks): If your splashbacks are tiled and have grout lines, regularly clean the grout using a grout cleaner or a mixture of baking soda and water to keep it looking fresh.
Maintaining Splashbacks:
Sealing (if applicable): If your splashback material requires sealing (e.g., natural stone), make sure to reseal it at recommended intervals to maintain its protective qualities.
Avoid High Heat: Be cautious with heat sources near splashbacks. Direct exposure to high heat, such as from a gas stove flame or a hot pot, can damage some materials. Use trivets or heat-resistant pads.
Prevent Hard Water Stains: To prevent hard water stains on glass or metal splashbacks, wipe them down after each use with a dry cloth or use a squeegee to remove water droplets.
Avoid Abrasive Materials: Never use abrasive scouring pads, steel wool, or abrasive cleaners on your splashbacks, as they can scratch and damage the surface.
Check for Loose Fasteners: Periodically inspect splashbacks that are secured with fasteners (e.g., screws). Tighten any loose fasteners to ensure stability.
Protect Against Impact: Take care to avoid heavy impacts on your splashbacks, especially for glass or acrylic materials, which can crack or shatter upon impact.
General Tips:
Read Manufacturer Guidelines: Always adhere to the manufacturer's care and maintenance guidelines specific to your splashback material. These guidelines may vary depending on the material.
Avoid Harsh Chemicals: Stay away from harsh chemicals, including bleach, ammonia, and abrasive cleaners, as they can harm most splashback surfaces.
Use Cutting Boards: When preparing food, use cutting boards to prevent scratches and stains on your splashback, especially if it's positioned behind the kitchen sink.
Dry Thoroughly: After cleaning, make sure to thoroughly dry the splashback to prevent the formation of water spots and streaks.
By following these cleaning and maintenance best practices, you can ensure that your splashbacks retain their beauty and functionality for years to come. Regular care will help protect your investment and keep your kitchen looking its best.
Innovative Splashback Designs:
If you're looking to create a unique and creative splashback design that goes beyond traditional choices, there are numerous custom designs, patterns, and artistic options to consider. These designs can make a statement in your kitchen and add a distinctive touch to the space. Here are some creative ideas:
Mosaic Artwork:
Consider the option of creating a mosaic splashback using an array of small, colourful tiles. This allows you to form intricate patterns, images, or scenes. Mosaics can be tailored to your preferences, allowing you to incorporate themes like floral motifs, geometric patterns, or even personalised portraits. Such designs can add a captivating and artistic dimension to your kitchen.
Graphic Prints:
Explore the possibility of using custom-printed glass or acrylic splashbacks that feature graphic designs or artwork. A wide variety of design options is available, ranging from abstract art to cityscapes. Custom graphic prints provide a versatile and visually striking way to enhance your kitchen's style.
Chalkboard or Magnetic Splashbacks:
For a combination of functionality and creativity, consider the installation of a chalkboard or magnetic splashback. These surfaces offer the flexibility to jot down notes, display recipes, or even showcase artwork. Chalkboard splashbacks can serve as practical communication hubs within the kitchen while also serving a decorative purpose.
Digital Printed Splashbacks:
Opt for digitally printed splashbacks that can display high-resolution images or custom designs. This offers an opportunity to introduce diverse elements into your kitchen décor, from captivating nature scenes to cherished family photos. Digitally printed splashbacks infuse a unique and personal character into the space.
Glass Etching:
Harness the potential of glass etching techniques to craft intricate and custom designs on glass splashbacks. Etched designs can range from elegant floral patterns to abstract art, providing a sophisticated and bespoke touch to your kitchen.
Backlit Splashbacks:
Consider the installation of backlit splashbacks with integrated LED lighting. This choice can create a stunning visual effect, particularly when employing coloured or frosted glass. Backlit splashbacks elevate your kitchen's aesthetics, making them a central focal point.
Textured Glass Splashbacks:
Opt for textured glass splashbacks to introduce depth and dimension into your kitchen. Texture options include raindrop, cracked ice, or frosted patterns, allowing you to create a unique visual and tactile experience.
Terracotta or Ceramic Art Tiles:
Incorporate hand-painted or artisanal terracotta or ceramic tiles into your splashback. These tiles can showcase intricate artwork or patterns, adding a touch of rustic charm and artistic flair to your kitchen.
Vintage or Antique Tiles:
Discover vintage or antique tiles with distinctive patterns and colours. These tiles can infuse your kitchen with a nostalgic and eclectic atmosphere, particularly if your kitchen design leans towards vintage or eclectic styles.
Reclaimed Materials:
Consider utilising reclaimed materials such as reclaimed wood, tin ceiling tiles, or salvaged architectural elements as a one-of-a-kind splashback. These materials can introduce character and history into your kitchen décor, contributing to a unique and sustainable aesthetic.
3D Wall Panels:
Install 3D wall panels crafted from materials like acrylic or textured MDF. These panels can add depth and intrigue to your splashback, producing a contemporary and visually captivating appearance.
Stained Glass:
Explore the incorporation of stained glass elements into your splashback design. Stained glass panels or inserts can introduce vibrant colours and intricate patterns into your kitchen, transforming it into a work of art.
When considering these creative splashback ideas, it's essential to align your chosen design with your kitchen's overall style, colour scheme, and theme. Consulting with a professional installer or designer can assist in the successful implementation of your unique splashback vision, ensuring both effectiveness and safety.
Splashbacks and Sustainability:
Eco-Friendly Splashback Materials:
Consider eco-conscious splashback materials such as recycled glass, reclaimed wood, bamboo, or recycled metal. These choices have a reduced environmental footprint, often using recycled or quickly renewable resources. For example, recycled glass diverts waste from landfill, while reclaimed wood adds character and warmth. Sustainable materials can also provide a natural, modern, or distinctive aesthetic to your kitchen.

Environmental Impact and Kitchen Appeal:
Eco-friendly splashbacks decrease resource consumption, conserve energy during production, and support responsible waste management. Additionally, they elevate the appeal of your kitchen by creating a natural, modern, or character-rich ambiance. Sustainable materials contribute to a healthier indoor air quality, offer durability, and demonstrate your commitment to an eco-conscious way of life. Pair these materials with green practices such as energy-efficient lighting and water-saving fixtures for a truly sustainable and aesthetically pleasing kitchen.
Cost Considerations:
here's a breakdown of the cost factors associated with splashbacks, including materials, installation, and maintenance, along with tips for budget-conscious homeowners on making informed choices:
Cost Factors:
Materials: The choice of splashback material significantly impacts the cost. Common materials include glass, tiles, stainless steel, acrylic, and natural stone. High-end materials like custom-printed glass or designer tiles can be more expensive than basic options.
Size: The size of the splashback area affects the cost. Larger kitchens will require more materials and potentially higher installation costs.
Installation: Hiring professionals for installation can incur additional expenses. This includes labour costs, adhesive, grout, and any necessary tools or equipment.
Customisation: Custom designs, patterns, or unique features can increase costs. For instance, mosaic tiles or intricate patterns may require more time and materials to install.
Maintenance: Different materials have varying maintenance requirements. Some may need more frequent cleaning or sealing, which can add to long-term costs.

Tips for Budget-Conscious Homeowners:
Set a Budget: Determine a clear budget for your splashback project, including both materials and installation. Stick to your budget to avoid overspending.
Material Selection: Explore cost-effective materials that still offer the look you desire. For example, consider ceramic tiles instead of premium natural stone for a similar appearance at a lower cost.
Standard Sizes: Choose standard-sized splashbacks to minimise material waste and reduce costs. Custom sizes can lead to higher material expenses.
DIY Installation: If you have the skills and confidence, consider installing the splashback yourself to save on installation fees. Be sure to follow installation guidelines carefully.
Shop for Deals: Look for sales, discounts, and deals on materials. Consider clearance items or discontinued patterns for potential cost savings.
Comparison Shop: Obtain multiple quotes from installation professionals to find the best value for labour costs. Ensure they have experience with your chosen material.
Consider Alternatives: Explore alternative materials that mimic the look of pricier options. For instance, acrylic splashbacks can emulate the appearance of glass at a lower cost.
Maintenance Costs: Factor in long-term maintenance costs when selecting materials. Choose options that align with your maintenance budget and cleaning preferences.
Sealing and Grout: If you opt for tiled splashbacks, choose grout and sealants that are budget-friendly but still effective. Regularly maintain grout to prevent costly repairs.
Plan Ahead: Plan your splashback project alongside other kitchen renovations to maximise efficiency and reduce overall labour costs.
Sustainability: Consider eco-friendly materials that may have a higher upfront cost but can save you money in the long run through energy efficiency and durability.
By carefully considering these cost factors and following these budget-conscious tips, you can make informed choices that align with your financial resources while still achieving a stylish and functional splashback for your kitchen.
Personalising Your Splashback
Personalising your splashback is a wonderful way to inject your unique personality and style into your kitchen. You can achieve this through custom-printed glass displaying cherished photos or artwork, using artistic tiles with intricate designs, creating a meaningful mosaic, incorporating vintage or antique tiles, installing a chalkboard or magnetic surface for dynamic personalisation, featuring family recipes or quotes, showcasing your own photography, commissioning hand-painted artwork, selecting a favourite colour palette, or embracing travel-inspired décor. Personalisation not only enhances the aesthetics of your kitchen but also makes it a space that reflects your identity, adding warmth and character while telling your personal story.
In Conclusion
The choice of a splashback for your kitchen is more than just a practical consideration—it's an opportunity to infuse your personal style and values into your living space. Whether you opt for eco-friendly materials that resonate with sustainability or personalised designs that tell your unique story, your splashback is a canvas for self-expression. Current design trends, such as bold colours, patterned tiles, and minimalist aesthetics, offer a glimpse into the present design landscape. Still, the future holds exciting possibilities, including sustainable and smart solutions, biophilic influences, and a continued emphasis on personalization. As you embark on your splashback journey, remember that the most important trend is to make choices that reflect your personality and create a space you'll love for years to come. So, let your creativity flow, and let your splashback be the reflection of your style, values, and dreams for your home.
Frequently Asked Questions About Splashbacks
What are the Pros and Cons of Splashbacks
Pros:
- Protect walls from stains and splatters.
- Enhance the visual appeal of kitchens and bathrooms.
- Easy to clean and maintain.
- Available in various materials and styles to suit different designs.
- Can be customised for personalisation.
Cons:
- Installation costs may vary depending on the material.
- Some materials may require periodic maintenance.
- Limited heat resistance in certain materials like acrylic.
- May not cover large wall areas effectively.
Should a Splashback Be Wider than the Hob?
Yes, a splashback should ideally extend beyond the width of the hob to provide adequate protection against splatters and stains. A typical recommendation is for the splashback to extend at least 10-20 centimetres (4-8 inches) on each side of the hob.
Do You Need to Seal a Splashback?
The need to seal a splashback depends on the material used. Some materials, like natural stone or unglazed tiles, may require sealing to prevent water and stains from penetrating the surface. Glass, acrylic, and stainless steel splashbacks typically do not require sealing.
Can You Use No Nails on a Splashback?
No Nails or similar adhesives can be used to install lightweight splashbacks, but their suitability depends on the material and surface. For heavy or large splashbacks, it's recommended to use appropriate adhesive or mounting methods recommended by the manufacturer.
What Type of Splashback Is Best?
The best splashback type depends on your preferences, budget, and kitchen or bathroom design. Common options include glass, tiles, stainless steel, acrylic, and natural stone. The choice should align with your style, maintenance preferences, and overall requirements.
Can I Put a Splashback over Tiles?
Yes, you can install a splashback over existing tiles. However, it's essential to ensure that the surface is clean, smooth, and free from loose tiles or grout. Some splashback materials, like glass or acrylic, may require a flat and even surface for proper adhesion.
What Is the Best Height for a Kitchen Splashback?
The recommended height for a kitchen splashback typically ranges from 45 to 60 centimetres above the countertop. However, you can adjust the height based on your preferences and the potential splatter risk in the area.
The recommended height for a splashback below a cooker hood is 65 to 75 centimetres depending on the type of hob you have.
How Far Can Splashbacks Be from the Hob?
Splashbacks should extend at least 10-20 centimetres (4-8 inches) on each side of the hob. The exact distance may vary depending on the specific hob and splashback design.
How Do You Measure a Splashback Behind a Hob?
To measure a splashback behind a hob, measure the width and height of the area you want to cover. Ensure that the splashback extends beyond the sides to provide adequate protection. Measure accurately to determine the size of the splashback required for your space.